Hello!
We’re proudly presenting an awaited feature for Multi-Vendor: Vendor plans.
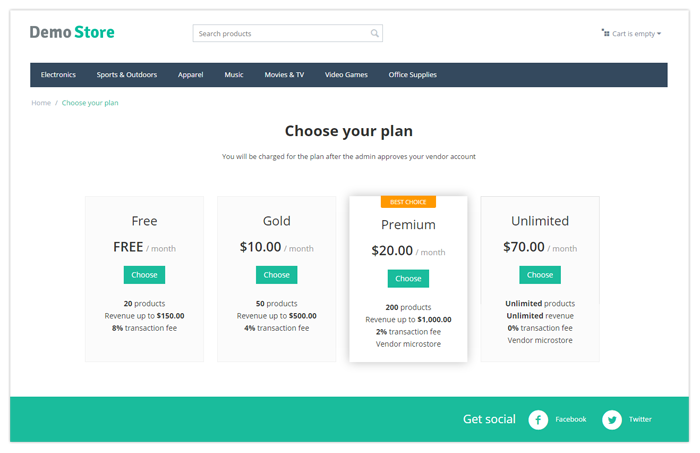
By using the Vendor plans add-on, you offer vendors subscription plans with certain restrictions, such as maximum number of products and maximum revenue.
The Vendor plans add-on is a flexible tool that gives you carte blanche to create subscription plans for vendors and helps increase revenue.
How to Get It
We haven’t included the Vendor plans add-on in the Multi-Vendor 4.3.6 package because we’re counting on you to beta test it. We’ll add the finishing touches to the add-on according to your suggestions.
To test Vendor plans, visit a special Multi-Vendor demo site: your personal fully-featured Multi-Vendor store will be created for 24 hours.
To get Vendor plans for your own Multi-Vendor 4.3.6 installation, access your Help Desk account, and install manually.
The Vendor plans add-on is not compatible with the Vendor commission add-on. Disable it before installing the Vendor plans add-on.
1. Log in to your Help Desk account, and go to the File area
2. Go to the Software folder, and download Vendor plans add-on for Multi-Vendor 4.3.6 [Beta testing]
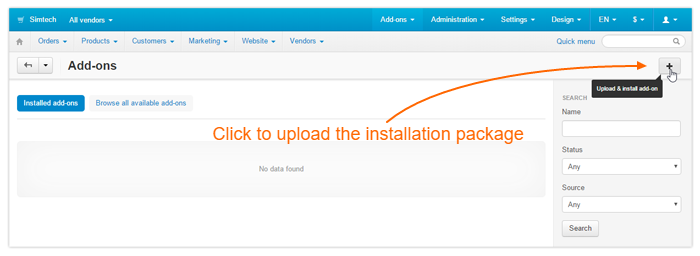
3. In your store’s admin panel, go to Add-ons → Manage add-ons and click the + button:
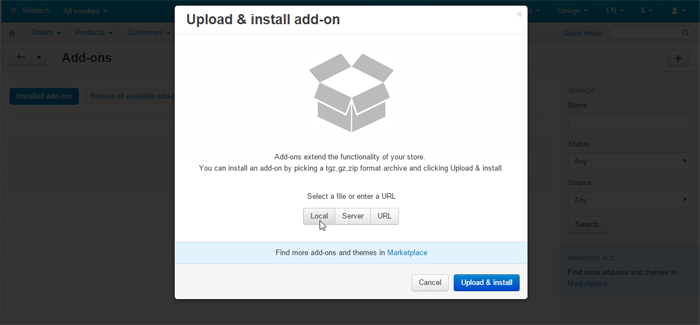
4. Click the Local button, and upload the installation package from your computer:
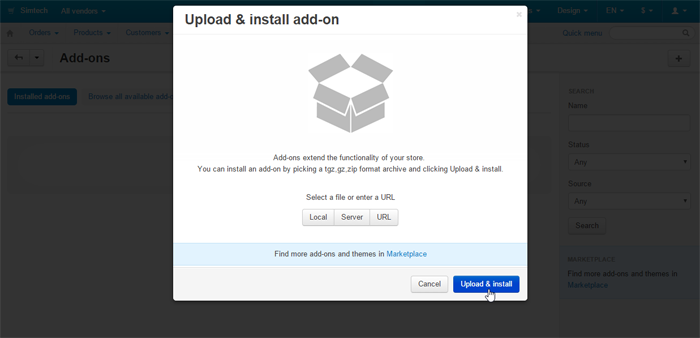
5. Click Upload & install to install the add-on:
How to Set It Up
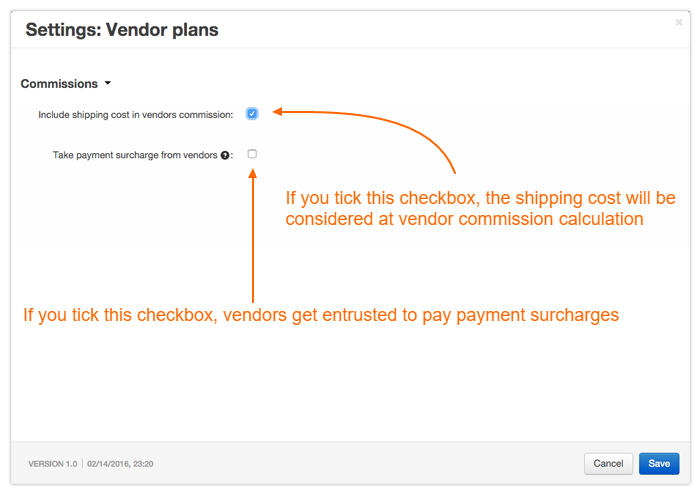
To open the Vendor plans add-on settings, go to Add-ons → Manage add-ons, and click the add-on’s name
How to Use It
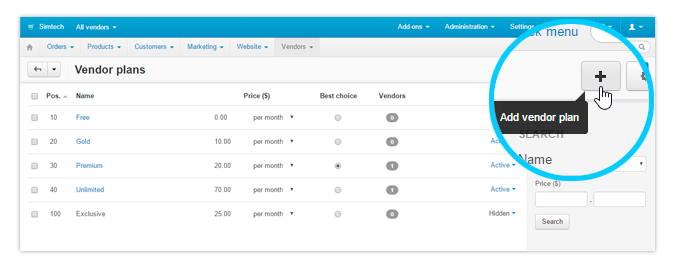
On the Vendors → Vendor plans page, you’ll see a list of all vendor plans available in your store. On this page, you can add a new plan and edit and delete existing ones.
Create a Plan
On the Vendors → Vendor plans, page click the + button to add a plan:
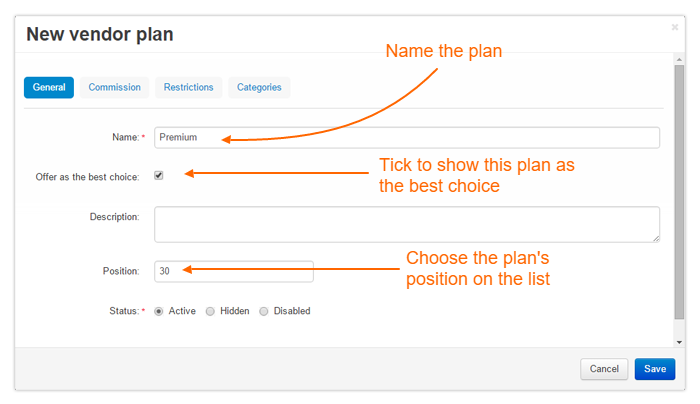
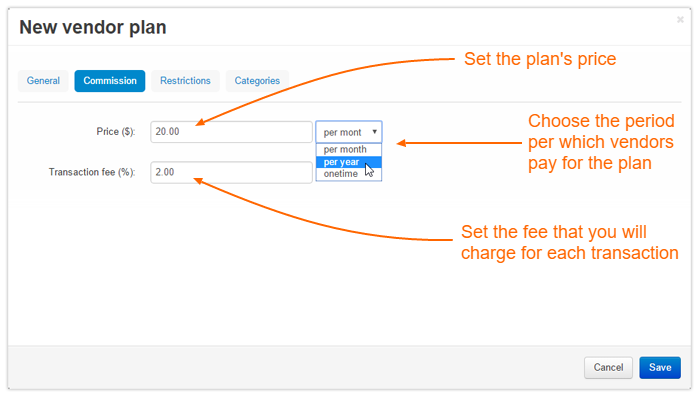
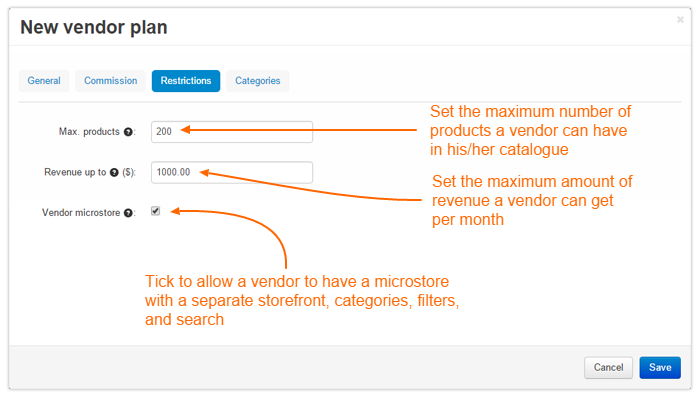
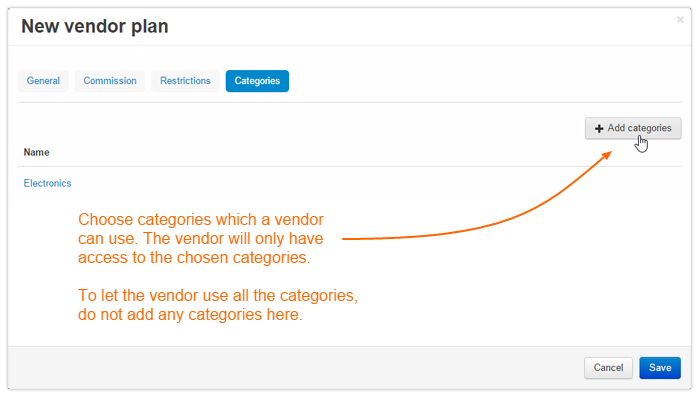
You’ll see a pop-up with the plan’s settings divided into four tabs. To set up the plan, fill in the necessary fields on each tab:
General:
Commissions:
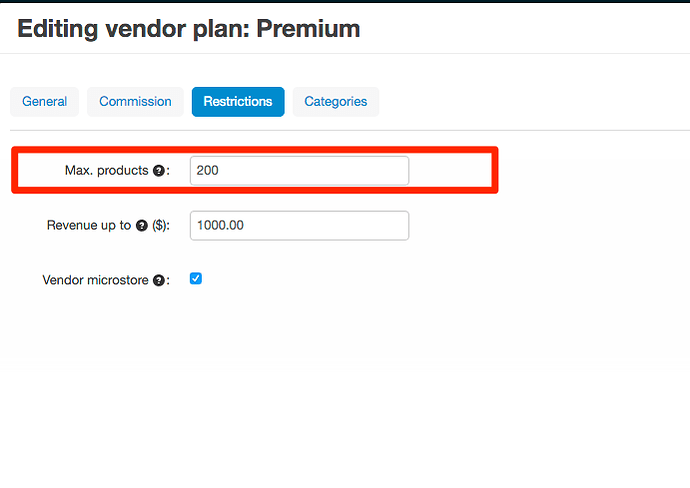
Restrictions:
Categories:
When you finish with the settings, click Save.
Add the Vendor Plans Page to Your Storefront
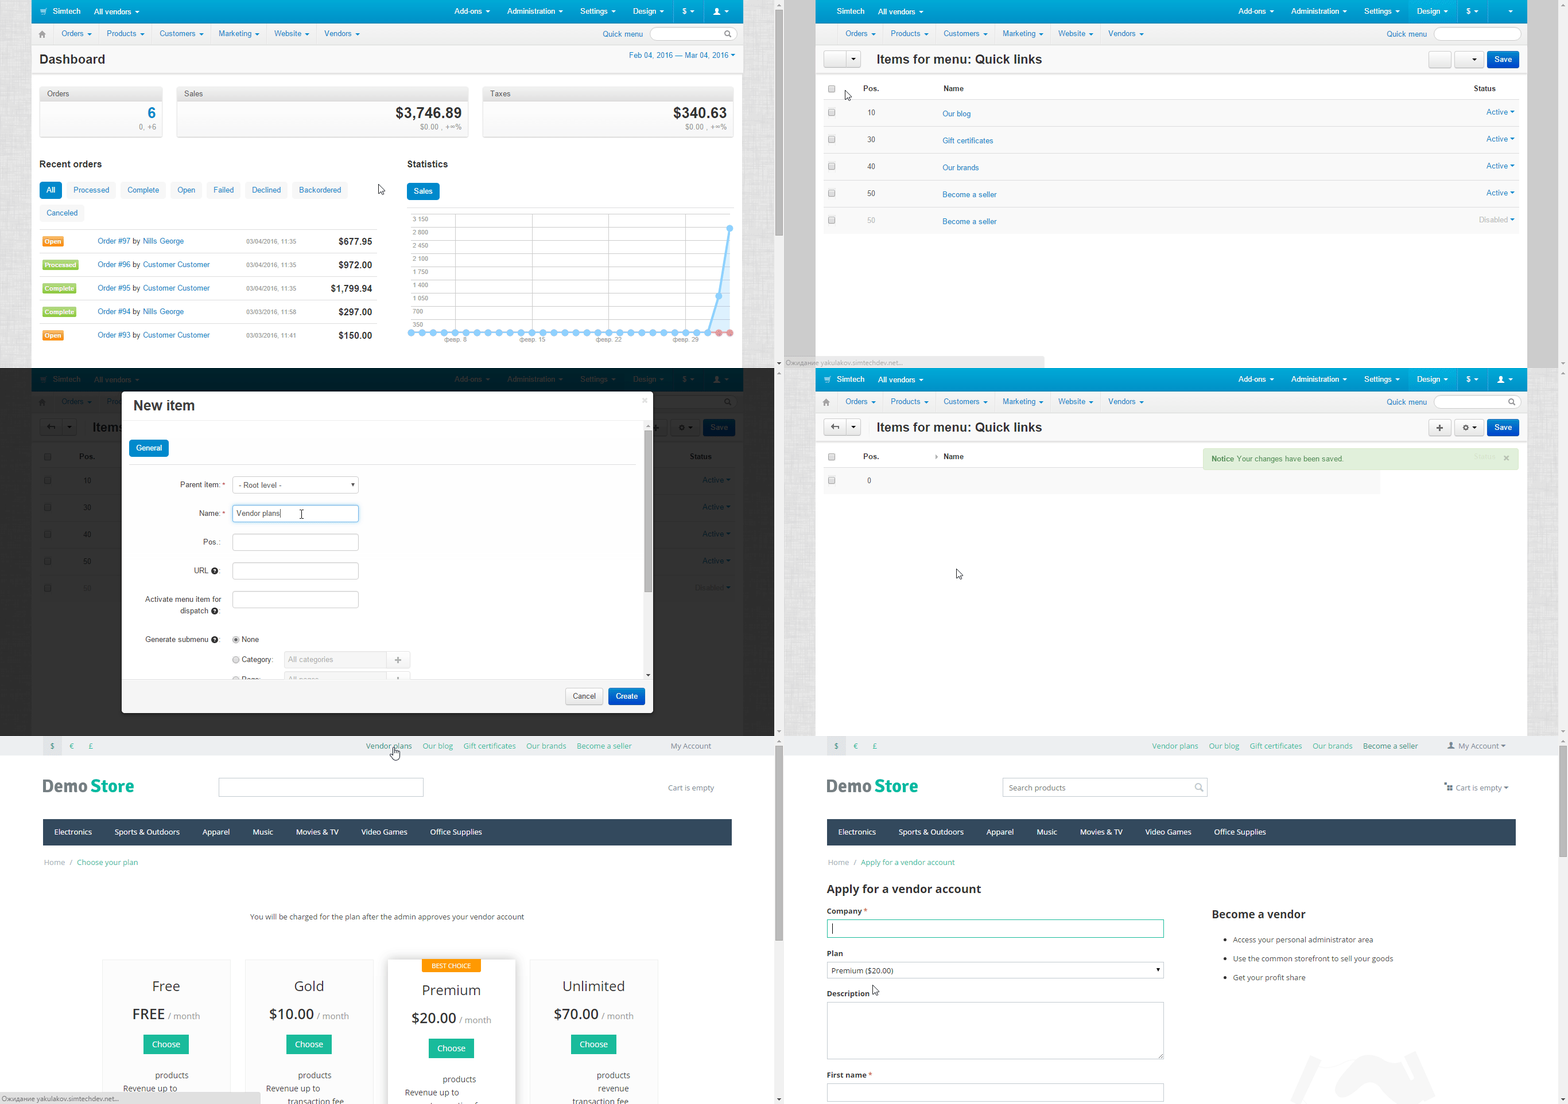
To display vendor subscription plans on your storefront, add the link to the Vendor plans page. When visitors choose one of the available plans on that page, they are automatically redirected to the vendor account registration page with a preselected plan.
To add the Vendor plans page to your storefront, create a quick links menu item with the companies.vendor_plans URL:
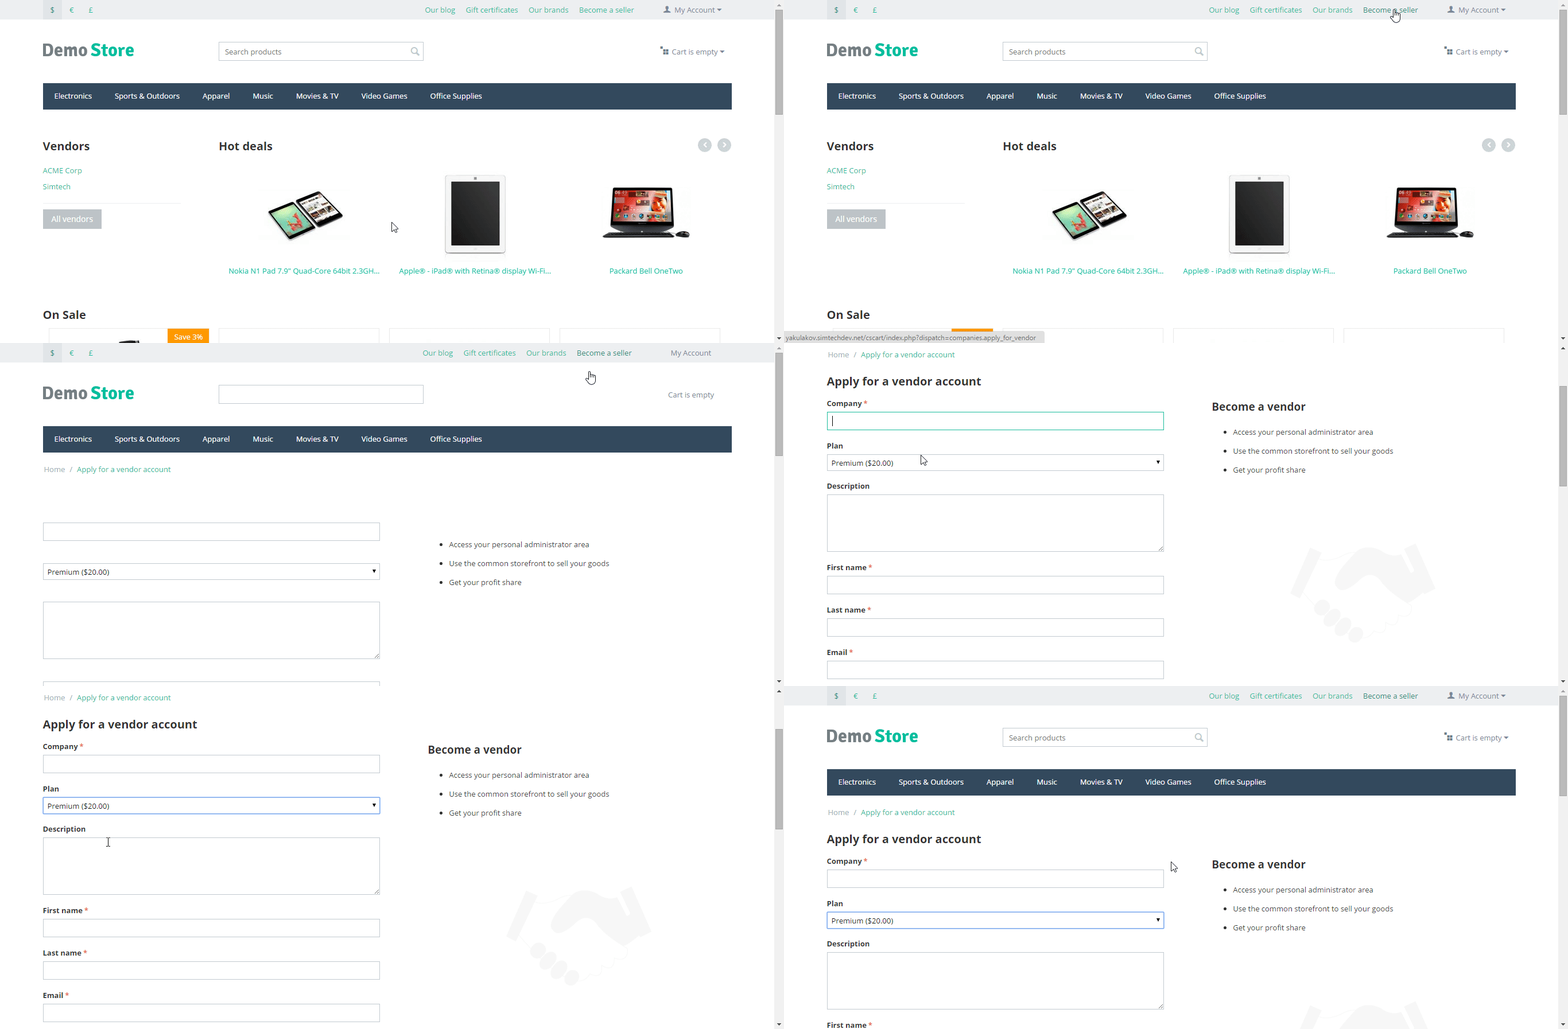
Also, visitors can click the Become a seller link at the top of the page to go directly to the Apply for a vendor account page and choose there a desired plan under the Plan drop-down:
Assign a Plan to Existing Vendors
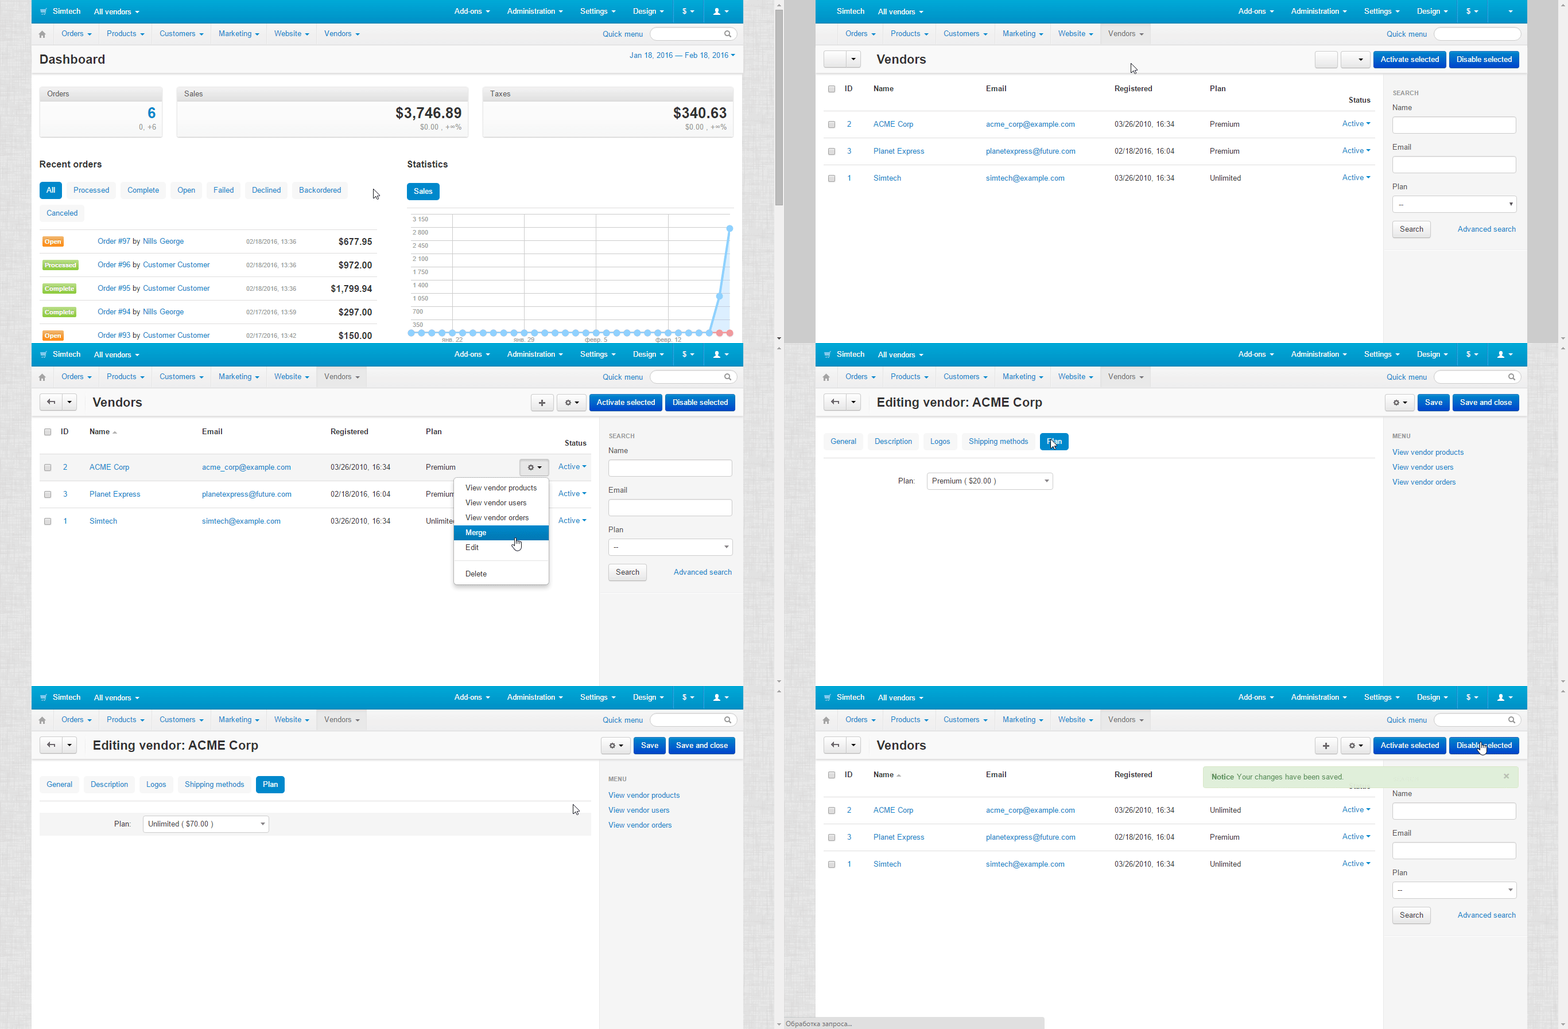
Assign and change plans for existing vendors on the vendor editing pages:
How Vendors Work with Plans
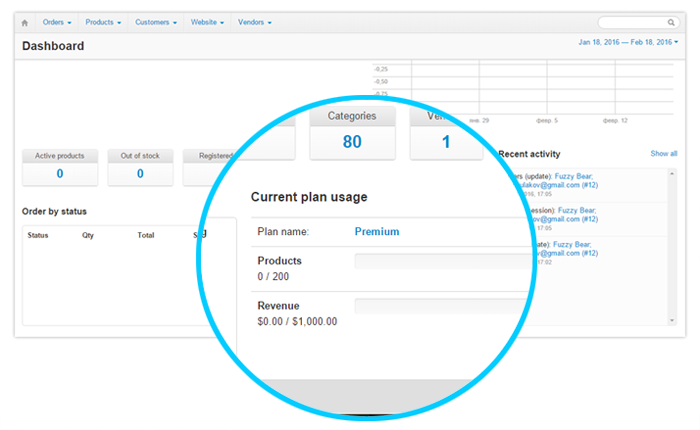
As we mentioned above, each plan has restrictions. A vendor can monitor the limits of his or her plan in the dashboard:
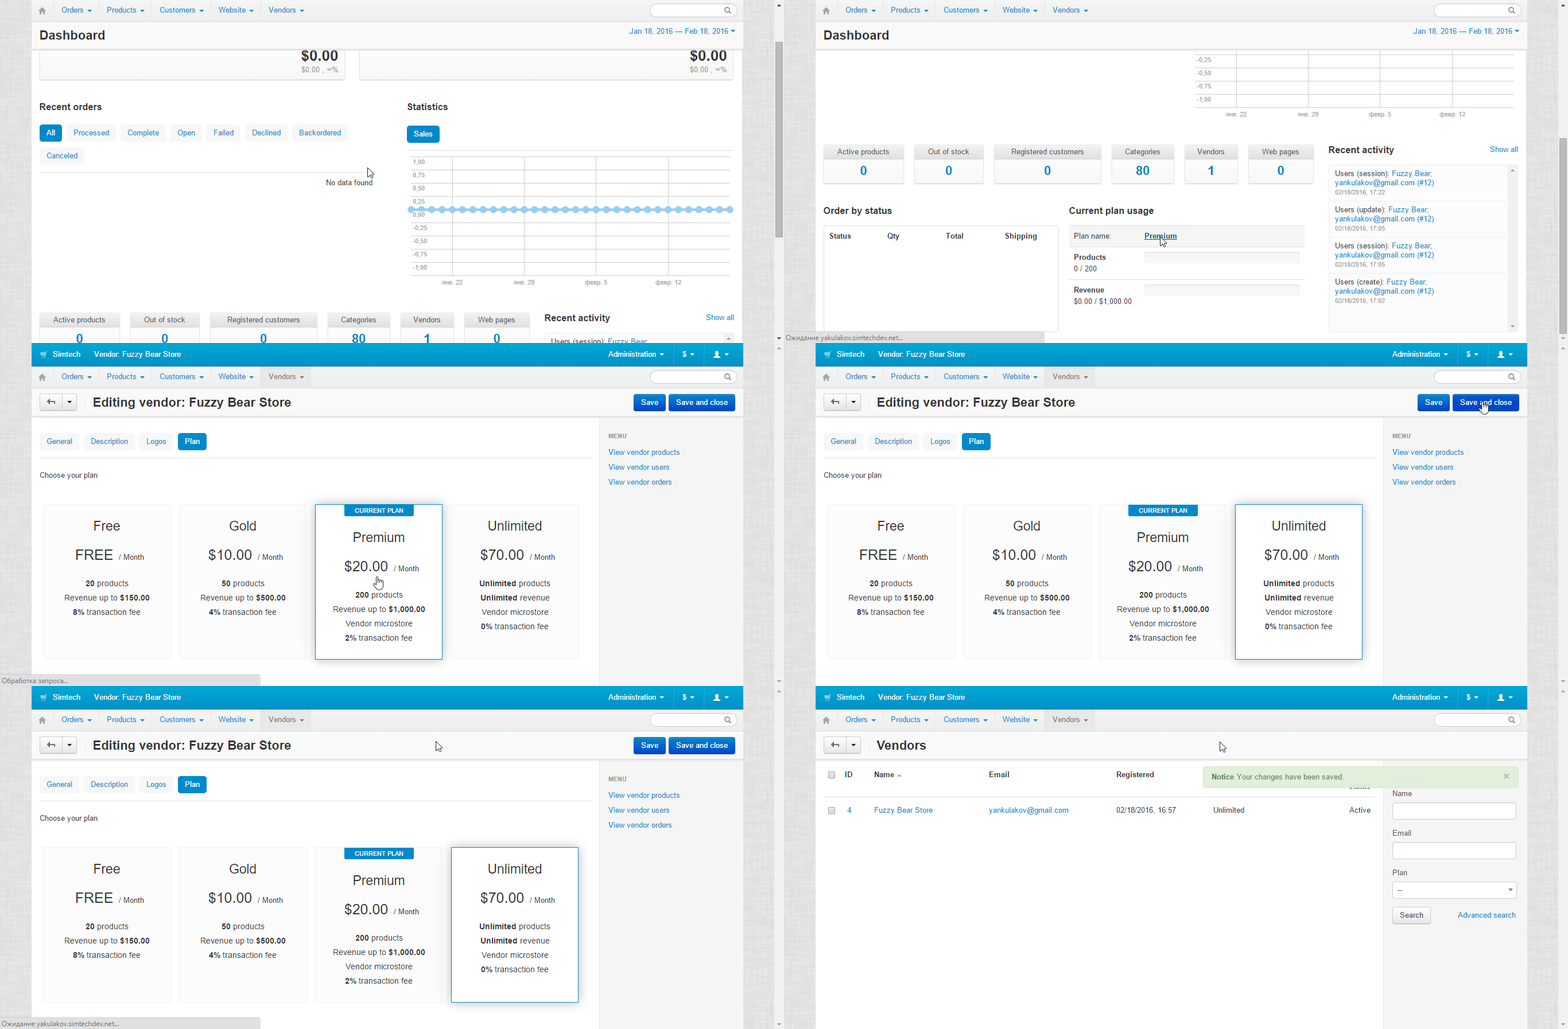
Also, a vendor can move to another plan right on the dashboard himself:
--
We’re happy to hear what you think about Vendor plans. Please share your thoughts on how we can improve the add-on here in this topic.
We’ll consider all good ideas and will probably incorporate the suggested features.
Report issues to our bug tracker if you find any.
