Hello Community,
We are glad to present an addon CS-Cart WooCommerce Connector.
Short Description
CS-Cart WooCommerce Connector allows an admin to sync WooCommerce products and orders to the CS-Cart store. And also allows the admin to map WooCommerce’s category, payment methods, and shipping methods with CS-Cart.
Using this add-on, the admin is no longer required to configure the product data and information on both stores separately.
Features
- Well integrated with CS-Cart and CS-Cart Multivendor.
- The product information like name, price, quantity, and other attributes gets updated in real time.
Allows admin
-
To import products from the WooCommerce store to the CS-Cart store with product variations (Product Variation Add-on will be Required).
-
To map it with the CS-Cart category.
-
Mapping of WooCommerce payment methods with CS-Cart payment methods.
-
Mapping of WooCommerce shipping methods with CS-Cart shipping methods.
-
Synchronization of orders from WooCommerce to CS-Cart and from CS-Cart to WooCommerce in real time.
-
Admin can handle multiple WooCommerce merchant accounts from the CS-Cart Panel.
-
The store status will also be shown on the store edit page.
-
Added a new order status mapping tab and also added an option to select the default order status.
-
Also added multiple settings on the Product tab such as Variation type, SEO/Slug from WooCommerce, WooCommerce product link, export products, export categories, etc.
-
Option to change hook setting for product update, a product created, order update, and also order created, etc.
-
Domain has been also added to the store manage page.
-
Also, have the option to export products from the product detail page
-
Option to export products from the product detail page
-
On the product manage page, a delete button to delete the product and a link to the Woocommerce product are provided.
-
WooCommerce store currency can be mapped with CS-Cart store currency.
-
Supports product and order auto-sync.
Installation and Configuration
Step 1
When you’ll download the add-on, you get one zip file and the install.txt file. Read it carefully and follow it. Firstly click on the icon and select Manual Installation to upload the zip file as per the below screenshot.

Now, Click on “Local” to browse the zip file and then click on “Upload & Install”.

After installation of the add-on, you will find the “WooCommerce Connector” add-on in the list of the available add-on. Make sure, the add-on is activated as shown in the below snapshot.

Step 2
Now go to Website and click on WooCommerce Connector to add an account and configure.
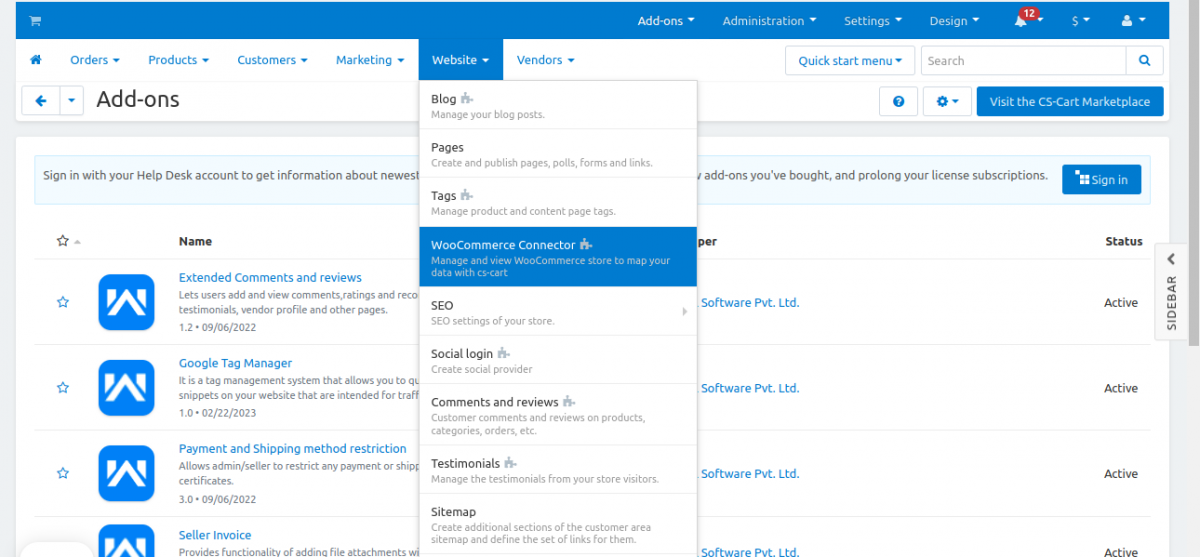
After that click on the plus icon to add a new WooCommerce account.

Step 3
Now, in the General tab, you will need to enter the WooCommerce app name and WooCommerce store URL and click on authenticate to authenticate the account as shown in the below snapshot –
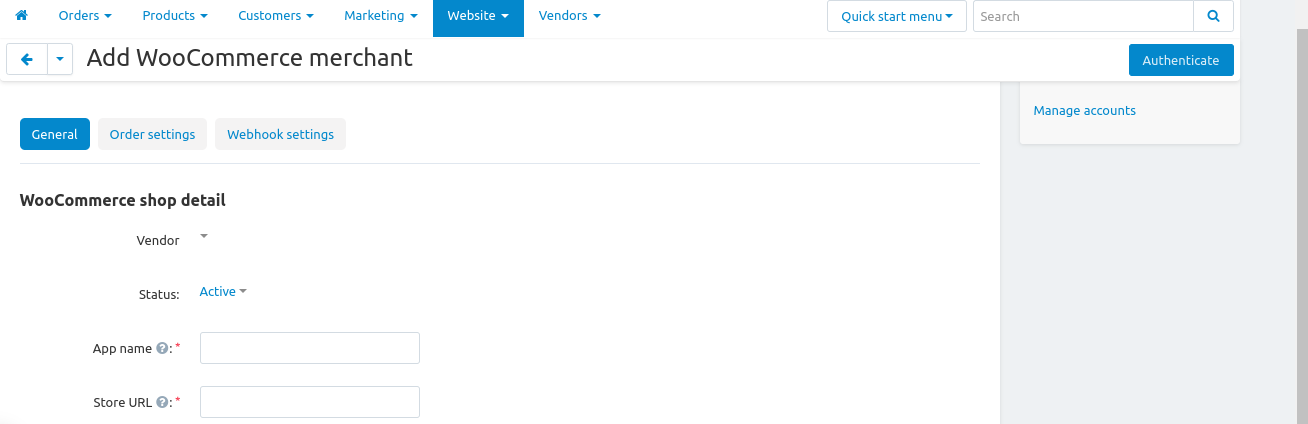
Further, when you will click on authenticate, the WooCommerce account details will get fetched automatically and the details will get filled in as shown below in the snapshot –

Step 4
Now after the General Settings, Configure the Order settings, Select the Payment Processor and Shipping method for export and import WooCommerce orders from here as shown below –
CS-Cart Status: CS-Cart default status when creating an order.
WooCommerce Status: WooCommerce default status when creating an order.
Payment Processor: Select the default Cs-Cart Payment processor when creating a WooCommerce order in cs-cart.
Shipping Method: Select the default Cs-Cart Shipping method when creating a WooCommerce order in cs-cart.

Step 5
For product setting, select the desired category to which WooCommerce products get imported and also select the currency from here. Click on the plus icon to select the CS-Cart category.

When you will click on the plus icon, a new popup of the CS-Cart category will get opened. Select the category and click “Choose”.

WooCommerce Currency: You can choose the WooCommerce Store’s currency here.
WooCommerce Variation Import as: If you want to create (Variations as one product), then select yes, and if not, then select no (Variations as separate products) Cs-cart to WooCommerce.
Get WooCommerce SEO name: Here, you can decide whether to import the SEO name or not.
Show WooCommerce Link: You can choose whether or not the WooCommerce link should appear on the management or product import pages here.
Export to Products: Here you can select yes or no to export products or not from cs-cart to WooCommerce.
Export Category: Here you can select yes or no to export category or not from cs-cart to WooCommerce.
Import Visibility Hidden: Get WooCommerce catalog visibility of hidden products in the cs-cart with the given status.
Step 6
In Webhook settings, Click on register order webhook and register product webhook as shown below so that webhook is created for products created, updated, and order created in real-time. After configuring various settings click on Save.
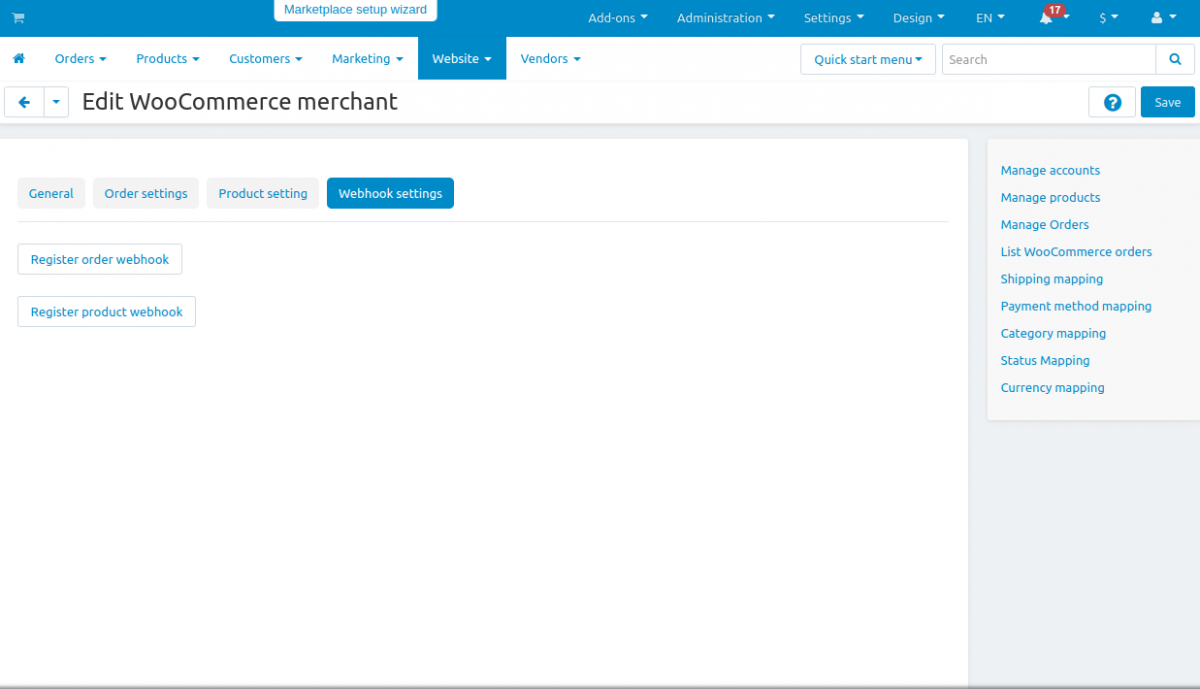
After Webhook settings it will redirect to the below shown page.

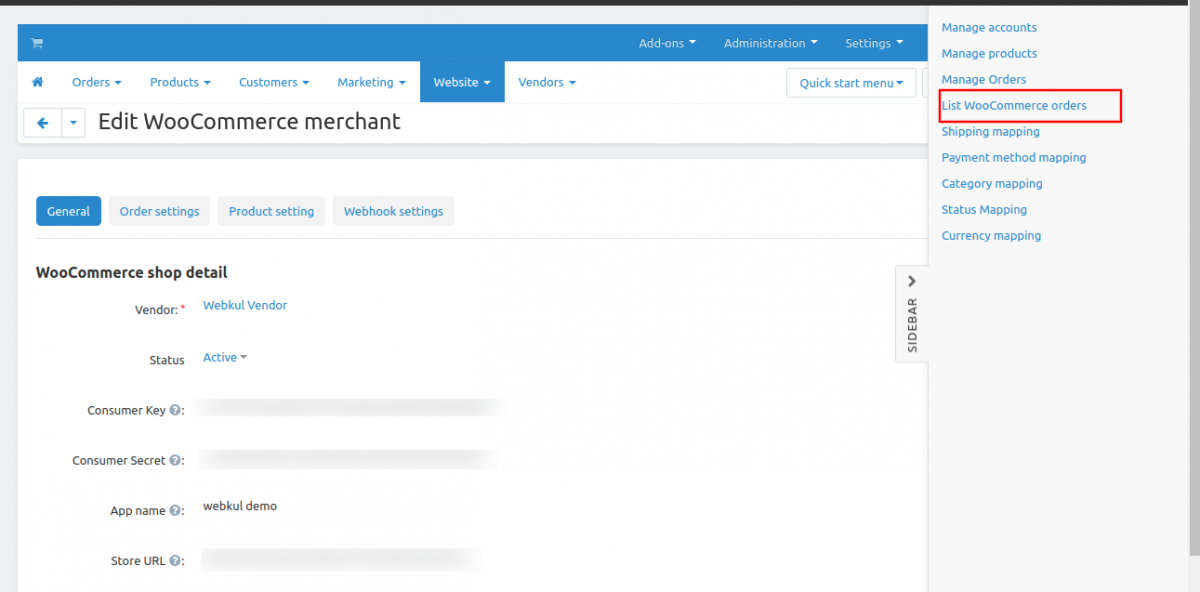
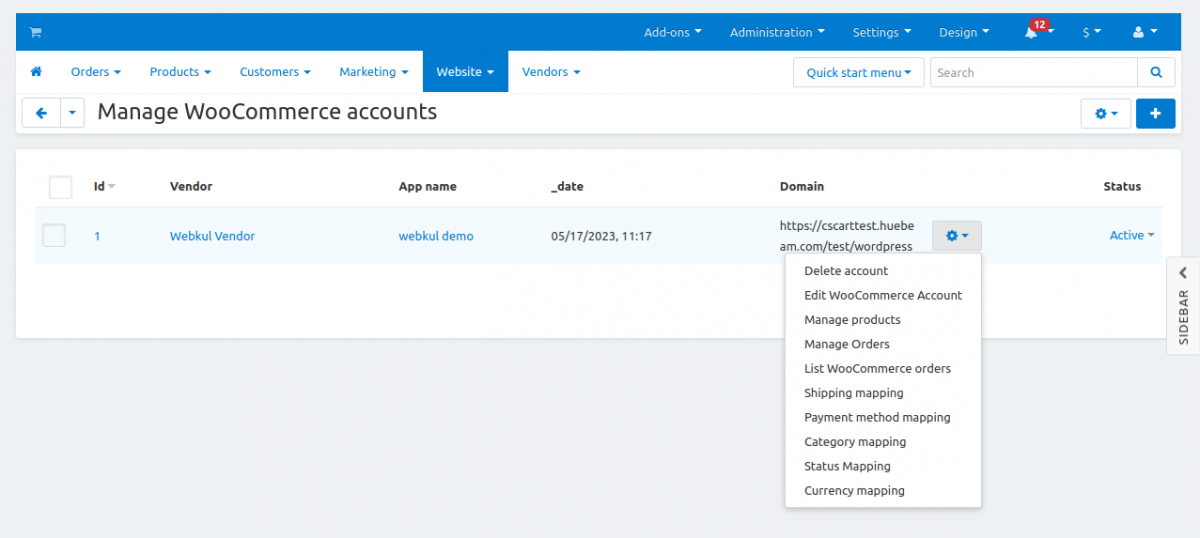
Once the account gets created, one can perform various actions from the WooCommerce store to CS-Cart store like Category mapping, Manage products, Manage orders, Shipping mapping, Payment method mapping and Deletion of the account.

Workflow of CS-Cart WooCommerce Connector
1. Category Mapping :
In category mapping, you can map the WooCommerce category with the CS-Cart category in order to import products.

After selecting the category, the store admins can Import the categories by clicking on the Import Categories option.

The imported categories will be displayed as per the screenshot.

2. Manage Products :
In this section, to import products from WooCommerce, click on “Import Products”.

When the admin clicks on the Import Products option then the below popup will appear.
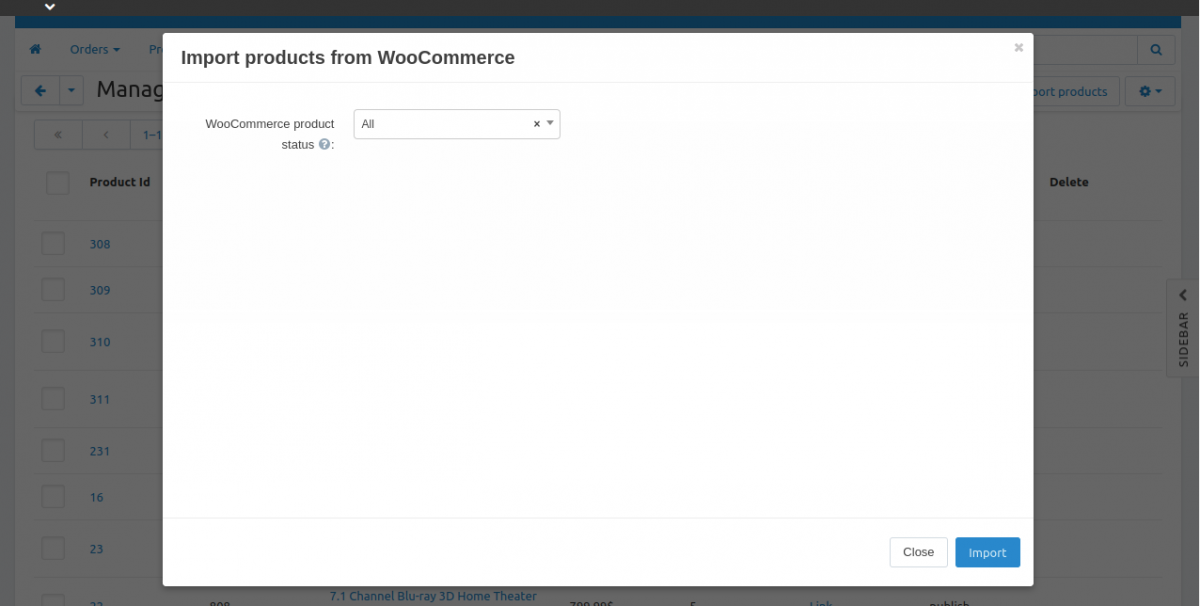
The admin can import the products according to the WooCommerce product status and click on the Import button.
This will redirect the admin to the below-mentioned page for product mapping.

The admin can map a single product by clicking on the Product Mapping option present in front of the product.
Moreover, they can multi-select the products and click on the Product Mapping button for bulk import.

Likewise, the store admin will export the products to WooCommerce by clicking on Export Products.
This will redirect the admin to the below image. From here, the admin can export any particular product or bulk export.

To export a single product the store admin will click on the Export to WooCommerce option presented in front of that product.
The CS-Cart admin will have to multi-select all the products and click on the Product Mapping button present in the top-right corner.

If the admin creates any new product then it will get auto sync to the WooCommerce store.

A success message will be displayed to the admin with the product creation.

The created product will reflect the WooCommerce products as per the screenshot.

3. Manage Orders :
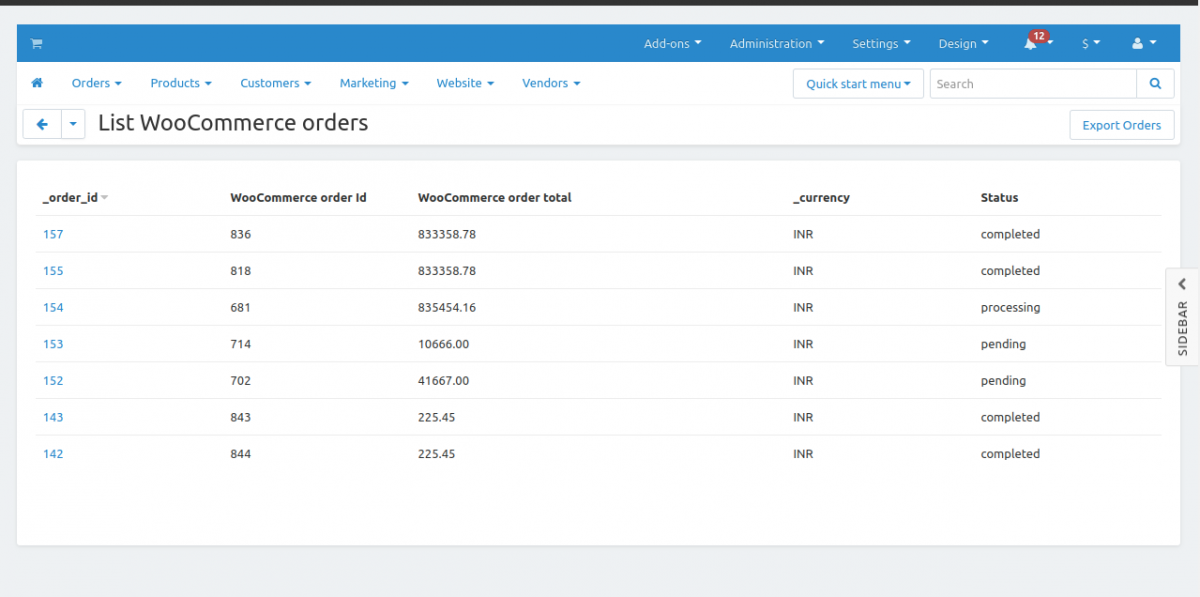
In this section, you can see the list of WooCommerce orders and CS-Cart orders both separately as there exists the synchronization of orders from Woocommerce to CS-Cart and from CS-Cart to WooCommerce in real-time as shown below –
View of WooCommerce orders list placed from CS-Cart’s end
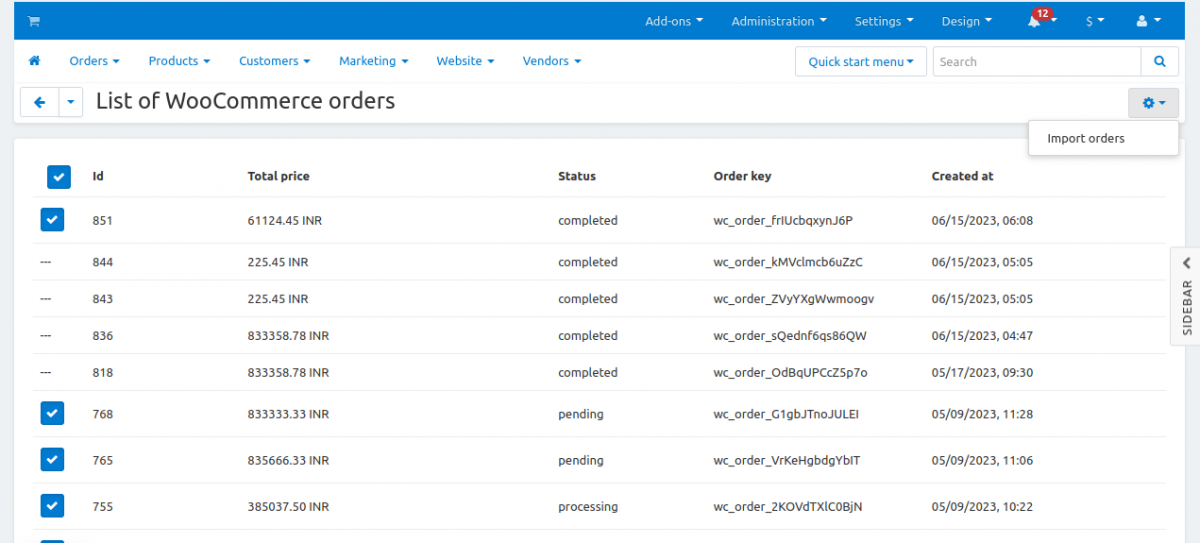
View of WooCommerce orders list placed from WooCommerce end
The list of all the WooCommerce orders will display as shown below.

The store admin can import the orders from here separately by clicking on the Import Order option as shown in the screenshots.

The admin can also mass import the orders by multi-selecting them and clicking on the Import Orders option as per the screenshot.
Moreover, the admin can export the orders by clicking on the Export Order button present at the top-right corner as shown in the screenshot.

Similarly, the store admin can multi-select the orders from the checkbox and click on the Export Orders button available at the top-right corner.

Note- If a new order is placed by the customer then it will get auto-sync at the WooCommerce end.
4. Shipping Mapping :
In this section, you can map Woocommerce Shipping methods with CS-Cart shipping methods.
You need to click on the following icon to import shipping.

Now, the imported shipping will display as shown in the below screenshot.

After that, the imported shipping will be mapped with the CS-Cart store.

5. Payment Method Mapping :
In this section, you can map Woocommerce Payment methods with the CS–Cart Payment methods.

All the payment methods will get imported when the store admin clicks on the Import Payments button.

Once the payment methods will get imported, the store admin will map the CS-Cart payments with WooCommerce payments by multi-selecting and clicking on the Import Payments option as shown below.

6. Status Mapping:
The CS-Cart admin can map the status of the orders that are imported to the WooCommerce website. The admin will click on the Status Mapping option as shown in the screenshot.

The admin can see the below screenshot and from here they will map the CS-Cart order status with WooCommerce orders.

7. Currency Mapping:
The admin will select Currency Mapping from the dropdown menu as per the screenshot.

The below page will appear and the admin can make the settings to map the currency of the WooCommerce order to the CS-Cart website currency.

8. Delete Account :
In this section, the admin can Delete the created account.
You can visit the purchase link here Add-ons :: WooCommerce Connector
You can also check the live demo here CS-Cart DEMO
For any query, contact us at HelpDesk Webkul Software Pvt Ltd
For any information or assistance, please feel free to contact us.