Hello Community,
We are glad to present an addon CS-Cart Prestashop Connector.
Short Description
CS-Cart PrestaShop Connector allows you to synchronize Prestashop products and orders to the CS-Cart store.
Using this add-on, the admin/seller will no longer be required to configure the product data and information on both stores separately.
The admin/seller can sync the products, and orders from the PrestaShop store to the CS-Cart store. And can also manage multiple accounts to exchange and synchronize the data between CS-Cart and PrestaShop.
Features
- Well integrated with CS-Cart and CS-Cart Multivendor.
- Admin/Seller can import products from the PrestaShop store to the CS-Cart store with variations (Product Variation Add-on Required).
- The product information like name, price, quantity, and other attributes can be updated to the CS-Cart end in real-time.
- Admin/Seller import products by single ID or multiple IDs separated by commas
- Admin/Seller can map PrestaShop categories with CS-cart categories.
- Synchronization of orders from CS-Cart to PrestaShop in real-time.
- Admin can add and handle multiple PrestaShop merchant accounts from CS-Cart Panel.
- The store status will be shown on the store edit page.
- Added a new order status mapping tab and also added an option to select the default order status.
- Added multiple settings on the Product tab such as Variation type, SEO/Slug from Prestashop, Prestashop product link, export products, export categories, etc.
- Option to change hook setting for product update, a product created, order update, order created, etc.
- Domain has been added to the store manage page.
- Option to export products from the product detail page.
- Option to export products from the product detail page
- On the product manage page, a delete button to delete the product and a link to the Prestashop product are provided.
Installation and Configuration of CS-Cart Prestashop Connector

Now, Click on “Local” to browse the zip file and then click on “Upload & Install”

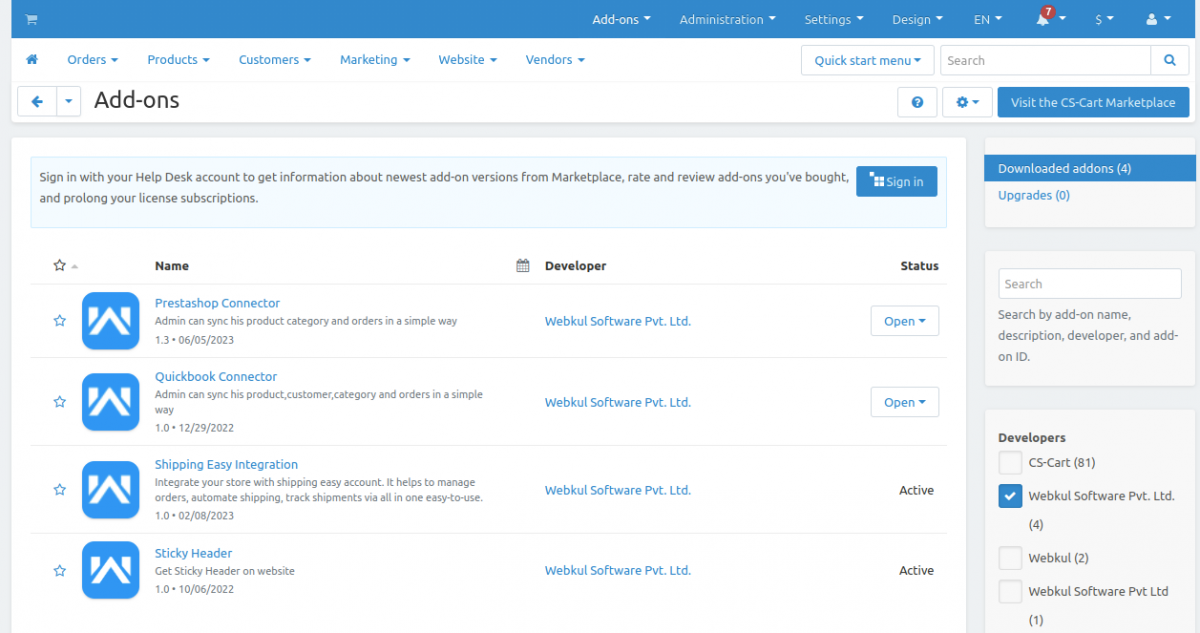
After installation of the add-on, you will find the “PrestaShop Connector” add-on in the list of the available add-on. Make sure, you activate the add-on as shown in the below snapshot.
Step 2:
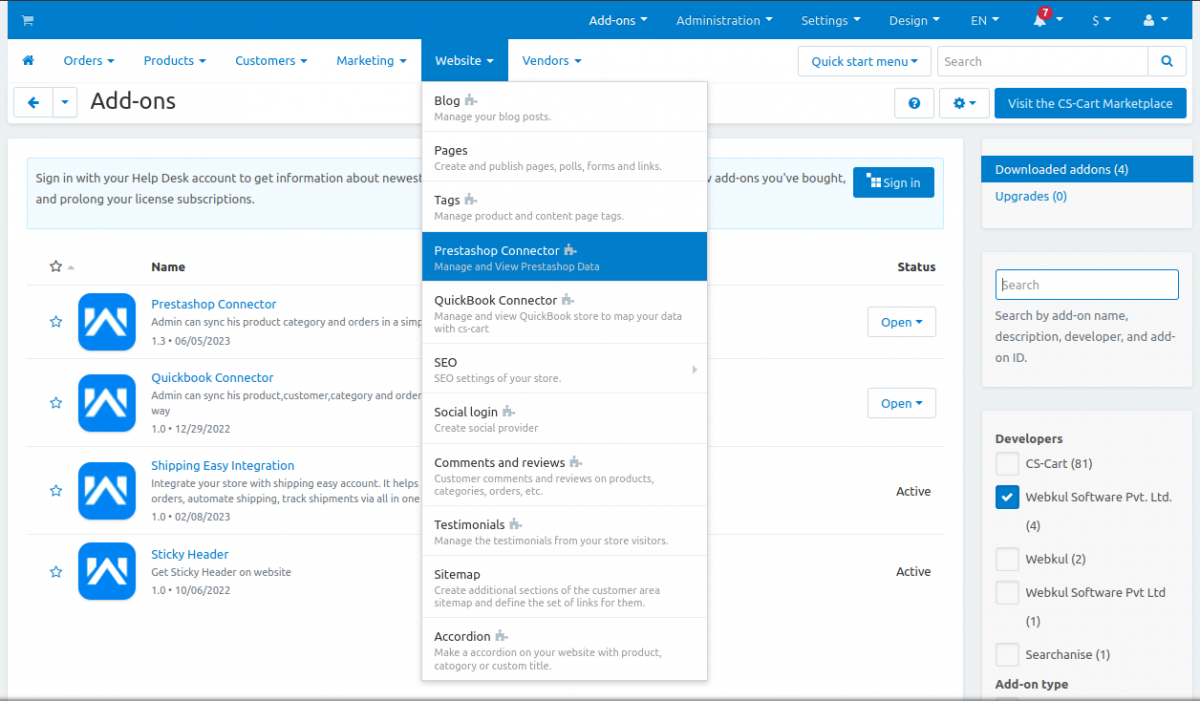
Now go to Website and click on PrestaShop Connector to add an account and configure.
After that, click on the plus icon to add a PrestaShop account.

Step 3:
Now, In the General tab, you will need to select the vendor then enter the API Key, PrestaShop store URL, and PrestaShop shop name.

Step 4:
After the General Settings, configure the Order settings.
- Select the Payment Processor for the orders which will get imported.
- Select the default shipping method for orders.

Step 5:
For product setting –
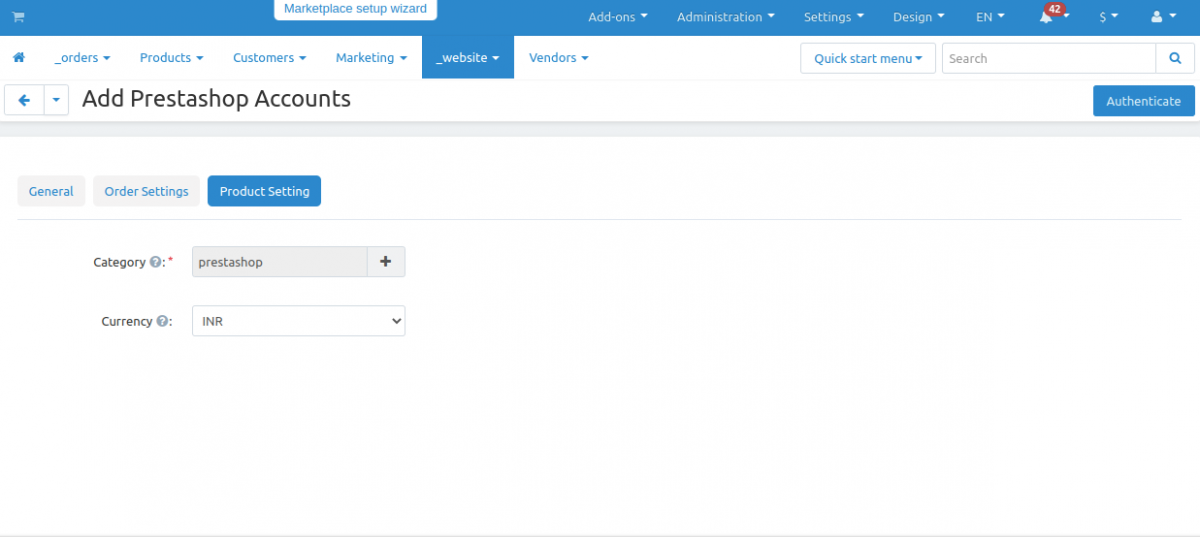
- Select the desired default category to which PrestaShop products will get imported
- Click on the plus icon to select the category. When you will click on the plus icon, a new popup of CS-Cart category will get opened. Select the category and click “Choose”.

- Select the currency.
- Enter the product quantity so if the products of PrestaShop will have a lesser quantity than the enter quantity, then those products will not get imported to CS-Cart end.
- After all the settings, click on authenticate button to authenticate.
Step 6:
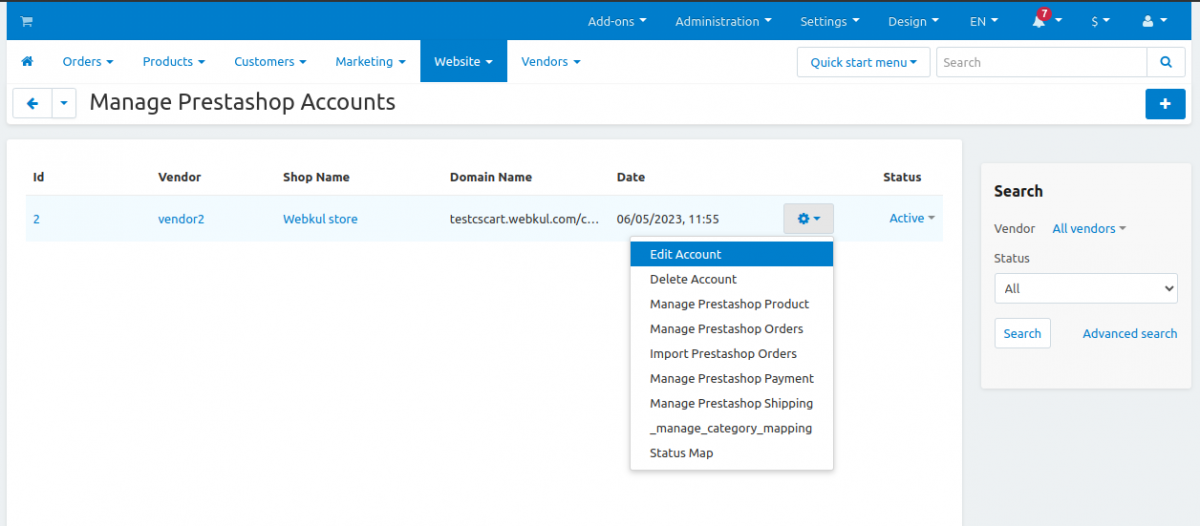
Now once the account gets create, one can perform various actions from the Prestashop store to the CS-Cart store like Category mapping, Managing products, Managing orders, Import PrestaShop orders, Management of PrestaShop shipping and payment methods and Deletion of accounts,etc.

Process for Setup at CS-Cart end
1. Manage Prestashop Products:
In this section, to import products from PrestaShop you need to click on “Import Products”.

When you will click on “import products” all the PrestaShop products of the selected category will be imported at the CS-Cart end.

Now you have to sync the product which you want to keep at the CS-Cart end. Just click on the Product Mapping button to sync the product. You can also select multiple products and can sync them.

Here are the imported products –
You can export the Product to the Prestashop store by clicking on “Export To Prestashop” from the settings icon as mentioned in the snapshot:

2. Manage Prestashop Orders:
In this section, you can see the list of orders made at the CS-Cart end for the products imported from Prestashop –

3. Import Prestashop Orders:
In this section, you can import PrestaShop orders and can see the list of PrestaShop orders for the imported products as shown –

4. Manage Prestashop Payment:
In this section, you need to set the payment method. So whichever payment method you will set here that payment method will use at the PrestaShop end to place the order (those orders will generate at the CS-Cart end for the imported PrestaShop products).
Note: The customer needs to know the name of Prestashop’s payment gateway to map the payment. (Screenshot by Lightshot)

5. Manage Prestashop Shipping:
In this section, you will get the list of all the shipping methods of PrestaShop end. You just need to activate the desired shipping method to use it for the PrestaShop orders, placed at the CS-Cart end.

6. Map New Category:
PrestaShop categories can be mapped to CS-Cart categories by the admin/seller.

7. Status Map:
In this section, you can the status of the CS-Cart order and Prestashop order.

8. Delete Account:
In this section, you can Delete the created account.

9. Edit Account:
In this section, you can edit the created account.
10. Export Customer:
In this section, you can export the customer by clicking on the setting icon as mentioned in the snapshot:

You can visit the purchase link here.
You can also check the demo here
For any queries or concerns, please contact us .